We are experts these days. Please click here to see our latest article on vermicompost. We think you will like it even more!
What is vermiculture? I wondered the same thing myself, because listening to garden podcasts and just talking to people about gardening in general I hear this term often. I know it is supposed to make my garden amazing. I hear it’s easy. So what is it?
It’s worms. And worm poop.
Before you say gross and stop reading, understand that this is probably one of the most beneficial things you can do to your garden – for free – and with little work. Let’s check it out.
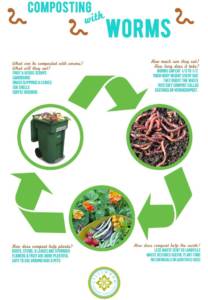
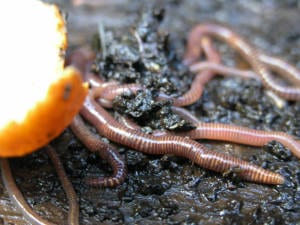
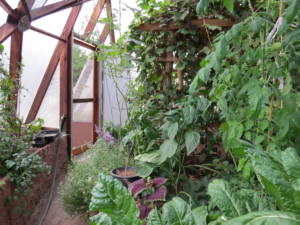
Vermiculture is the process of using worms to compost organic material. Food scraps, lawn and garden scraps, and newspapers all are reborn into something useable for the worms. They ingest these items and their bodies turn them into worm waste (castings) – black gold as some people call it! What these worms create is incredibly nutritious to the plants growing in the soil as it contains many times the phosphorus, nitrogen, and potassium that plants need to grow. The worms are basically microbe farmers, and through the wonders of science and evolution and with the help of bacteria, the worms produce something amazing that we get to benefit from. One of the benefits of vermiculture is that it can and should be done indoors, depending on where you live. The Growing Dome is a great place to keep your worms year-round, because the temperature is mild. It also doesn’t’ attract bears like traditional compost can.
The worms should be kept in some sort of container, an old cooler, plastic tub, or something you make yourself are all good options. They like to be warm, optimal temps are the same as ours, 60-80 degrees F. If you stand by their bed and you are cold, they probably are too. It’s nice to keep them inside, so you know what the temps are for them to be efficient. Make sure the container has a tight fitting lid and holes in the side for air flow.
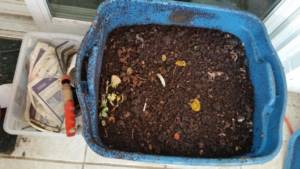
Getting Started
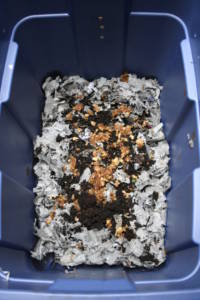
Once you’ve got your bed all made, start filling it by tearing up newspaper to line the bottom. Wet this newspaper, and squeeze out the extra water. Fluff up the newspaper so it’s not lying flat. Continue to do this until the bed is about 2/3 full.
In a well lit environment, place the worms on top of the newspaper. Because they don’t like the light, they will start to make their way down to the bottom and into the darkness. Then, add a little organic soil to the top of the newspaper. The worms need something to start with, and soil works well for them. Keep everything moist but not wet, and leave them alone for about 7 days to get them acclimated.
After a week or so, you can start adding fruit and veggie scraps to their box under the bedding or on top covered. If you liquefy them first, the worms will work faster and they will love you more, if a worm can love. Don’t ever feed them meat or dairy, they will sour and attract rodents. They also don’t like citrus, so leave things like lemons and oranges out of there. Your worm culture should never smell bad, if so it’s probably too wet. Add some more newspaper, grass clippings, or leaves.
Worms aren’t too particular, but if their environment becomes too acidic, or they don’t like the food they will move out. If the pH balance is off, if it’s too hot or too cold, this also could cause them to want to leave. But don’t worry, worms will only leave if it’s really bad in their bin, because they can’t survive outside on their own.
Now what?
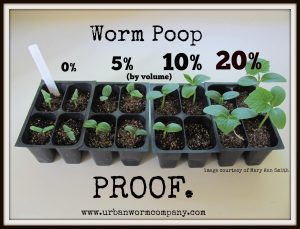
It takes about 6 months for you to get vermicompost (another name for worm poop). The easiest way to harvest is to push everything to the side, reach in to the bottom, and grab a handful. You can also buy or make bins that will do this for you. There are other ways to harvest too, such as pushing all to the side and putting in new bedding material that the worms will be attracted to and eventually migrate there. Any way you choose, you now have some amazing additions to your soil for your plants to use.
Now that you’ve harvested, you can simply spread the compost near the stem of the plants in about a 2-3 inch band. Water it thoroughly so the nutrients soak into the ground, and that’s it! Your work is done! You can also use this on your house plants and lawns, too.
There are many web sites that also sell vermicompost and various items and accessories for DIY and a finished product. Check out Arbico Organics and https://wormcompostinghq.com/. You can purchase worm composters from many places but this one comes recommended by wormcomposting.hq – Best Worm Bin. Get inspired by this art-meets-life collection of indoor worm farms Artist advocates worm composting.
This is a green technology and one that can help restore the planet. It is a natural way to help improve your soil, as well as keeping valuable food scraps out of the landfill and working for you!
Ready to have your own Geodesic Growing Dome? Here’s where you get all the info to get started, and something FREE too!
What a Growing Dome can do for you
